top of page
MARISSA MAGLIS


HUXLEY
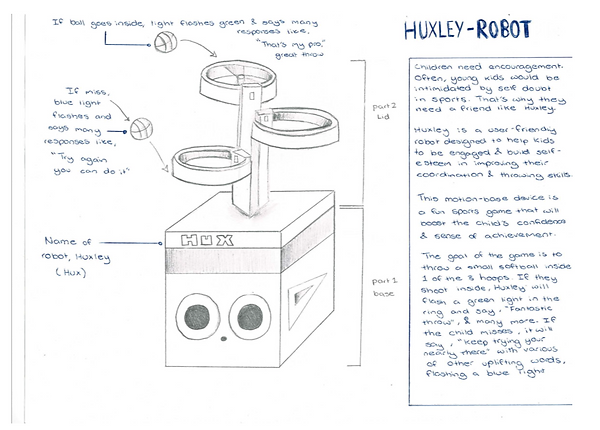
Huxley was developed to assist young kids aged (5 to 14 years old) to improve their hand-eye coordination and gross-motor ball skills.
To help kids grow and development, why not make it fun and playful with a friend like Huxley to challenge young ones in an exciting state?
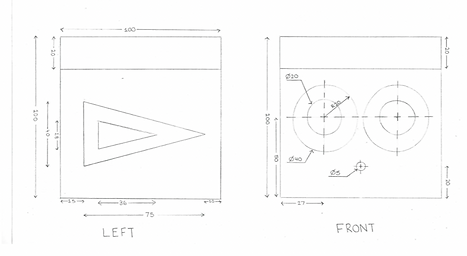
The design of Huxley had to be a physical housing for a motion sensor-activated device connected by a microbit at a 1:1 scale, from initial concept designs to 3D models and visual representations.
Sketches and Scales


3D Modelling


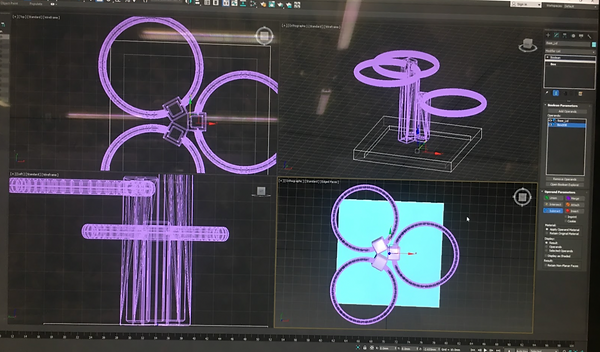
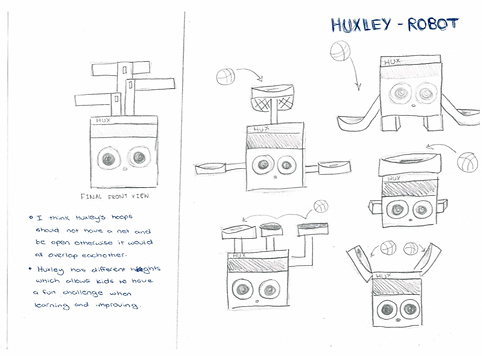
My design sketches were an idea to get myself on track to plan a 3d model. First I had to create a housing for a microbit case to fit proportionally to my Huxley. I had redrawn a new and improved model for aesthetic purposes and for my ideal parts to connect. I wanted to put shelling inside and connect each ring with the poles together without it falling when 3d printing which was a complicated process.
Throughout my journey, I used a variety of techniques used in class such as, cutting with boolean subtraction, shelling, extruding, chamfer, union and many more. However, due to limitations on the physical sizing in the next project, I had to get rid of Huxley's cute face from the original sketches.
3D Printing
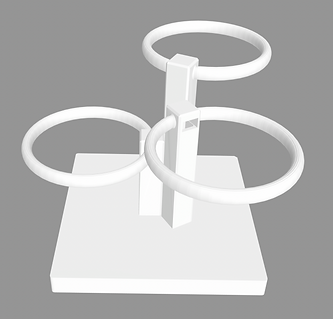

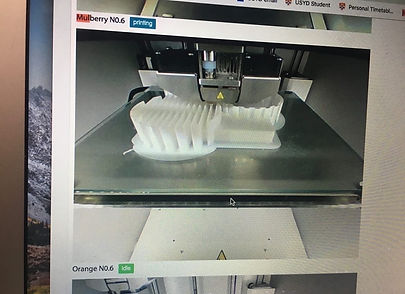
3D printing was a top priority when building my device. Although I was extremely worried as to how the hoops were going to 3d print as it was the main source of my device. I had to make some decisions and change my design as it was going to take 28 hours in print time. I placed my STL file in Cura, the overall look of my model had all three hoops empty which was perfect. Although, the inside housing of my device is very unique as I had chosen the simple, yet effective approach of having a case in my micro bit with a spacious gap between the hoops lid and the bottom base.
Huxley Model


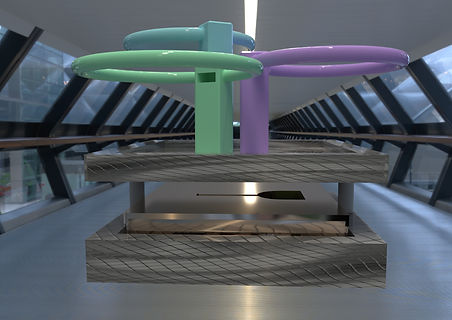


Overall, the Huxley poster was a success and an "eye-catcher" for my users. The positioning of the product was a thought-out process as I desired to take the best angle of Huxley without it being too awkward of a pose for the hoops.
I wanted to capture the product for kids to see how cool and futuristic the device was with the attraction of colourful hoops. The background could have been reconsidered to take away from its busy environment, however, time was catching up to me during the project and decided to go with it. Either way, I was happy with the outcome of such a challenging project and relieved.
Learning Outcome and Skill
- Perspective sketching
- Orthographic drawing
- User Interface and operations
- Points, curves and 2D operations
- Nurbs vs mesh
- Basic & complex surfaces
- Advanced 3D modelling techniques
- Boolean-based objects
- Modelling organic shapes
- Planar vs. 3D techniques
- Additive and subtractive manufacture
3d Form & 3ds Studio Max
Digital Fabrications
- Design of housings
- Production workflow for 3D printing
- Production workflow for laser cutting
- Templates for laser-cutting (Rhino)
- Advanced digital fabrication
Complex 3D operations
- Advanced rendering Techniques
- From 3D objects to flat UV maps
- Materials and textures
- Motion-based interfaces
- Lighting, camera angles etc.
- Post-production methods, using photoshop and supporting tools
bottom of page